Repeating the steps below is at your own risk; if you are not sure what your are doing, this may result in serious damage. My recommendation for everyone who wants to try this, is to use a Virtual Machine (I use Virtual Box).
For this experiment I have used a VM (VirtualBox) with one partition, containing XP. I have used TestDisk to alter the partition table so that the boot flag for this partition no longer was Active. I also have written the TestDisk MBR to the drive to illustrate that the partition is still there and can be booted from. I then dumped the MBR using linux's DD utility (using xPUD live CD), after which I opened this dump with HxD hex editor. I used this to manually change the bootflag for the partition back to Active. Finally I restored this fixed MBR using DD, et voila...
1. Use TestDisk to change the bootflag

After selecting the device, you get presented with some options. To see and alter partition information you need to select Analyse. After a Quick Search the following was displayed (see image below).

 Next I used the arrow keys to change the bootflag from Primary and bootable (*, see left image) to Primary partition (P, see right image).
2. Use TestDisk to rewrite the MBR

have rewriten the Master Boot Record with TestDisks MBR (this option is available after choosing the Device, see right picture). The only advantage is that this, when it doesn't see an Active partition or when it is not able to boot from the Active partition, will display manual boot yptions, as you can see in the left image below. The right image displays what happened when I pressed 1 at that point.

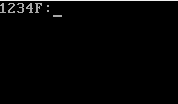 By doing that I forced the computer to look on primary partition 1 (as present in the partition table) for a boot loader. As this was present (on XP this is the NTLDR file), the boot process continued normally and Windows was loaded.
3. Dump the MBR with DD
 While it would be easy to change the boot flag back to Active (bootable) partition with TestDisk (just reverse the steps under point 1), lets fix this another way than I broke it. For the next steps I used the xPUD live CD and an USB jump drive. In xPUD I navigated to my USB drive (usually present in the File menu as /mnt/sdb1) and opened a terminal. I executed the DD command visible in the image, which dumped the first 512 bytes of the drive (otherwise known as the MBR) to my USB drive as mbr.bin.
4. Edit the MBR dump to manually change the boot flag

I have highlighted the partition table and color coded it for clarity. The first partition entry is yellow, the second green, the third blue and the fourth pink. Because this harddisk has only one partition, only one partition is present in the Partition Table.
In order to readjust the Partition Table so it will once again have an Active partition set, we can simply edit this dump. The bootflag for each partition is set in the first number of the respective partition entry (for the partition we need to adjust, this is 000001BE). The bootflag for the Active partition is 80, so we can simply edit the number in 000001BE and change it from 00 to 80. When done I saved the change I made in mbr.bin (to be sure I also saved the original as mbr.bin.bak) and transfered the USB jump drive with mbr.bin back to xPUD.
5. Restore the adjusted MBR

The computer booted normally afterwards.
I hope that this example has helped you to gain an insight in how the Partition Table "works" and how you can adjust it.
Very Interesting article Elise. Thanks as always for the great information :)
ReplyDeleteWell written.....keep it up
ReplyDeleteRoad Runner @ Geek U
Very informative. Thank you
ReplyDeleteThisisu @ MajorGeeks
Neat! Another use for TestDisk :)
ReplyDelete